Curious KIDSS
  • Home
  • Resources
    • First Impressions and Wildlife as Symbols
    • Oh Deer
    • Field Study Fun
  • Photos
  • Digital Media Sources
  • Get Outside!
  • About Us
  • Contact Us

Field Study Fun
Content Supplements

Mapping the Neighborhood

11/14/2018

2 Comments

 
Picture
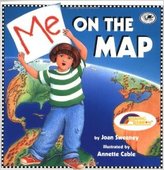
This series of activities can be used as an introduction to mapping for grades K-2. This series can be used as a stand-alone topic or as an introduction or extension to other activities. Students will use Me on the Map as an anchor text in order to create their own version of the book, using their school instead of their home. 
 
As you read, you can ask students for examples from their own homes, or from their school. Using the school as the setting may prevent students from feeling uncomfortable about sharing details concerning their homes, especially if students may not have a home to reference.
 
Based on class needs, the book can be read as a whole class read-aloud, in small groups (with or without teacher guidance), or individually. The following activities can be done by first reading the book, then creating a list of features, then drawing the map. An alternative would be to read the book and create the feature list, and then draw all of the maps.
  1. Read the book from beginning to end.
    1. As the girl looks at her house, use Google Maps to look at an aerial view of the school.
    2. As she looks at her street, town, state, and country, continue to zoom out at each step. At the same time, discuss the school’s street address, town, state and country.
    3. Zoom back in on the map at each step as you finish reading the book.
    4. For Grade 2 – Reference different ways technology has changed the map-making process (maps drawn by hand as people traveled, pictures taken by balloons or planes or satellites) and the accessibility of maps (maps were very rare and had to be hand copied; printing presses allowed easier reproduction; digital access was limited to government and researchers; open digital access).
  2. Go back to the beginning of the book and explain that students will be publishing their own version of the book. As the book is read for a second time, students will create lists of places and features to include in their book.
  3. On the “This is the map of my room” page, ask students to list locations, areas, features, and other pertinent information to feature on their map.
    1. Divide the classroom into quadrants. Divide students into 4 groups. Assign a group to map each quadrant. 
    2. Depending on student ability, students could:
      1. List features of the quadrant and the teacher could draw the map.
      2. Work collaboratively to draw their quadrant.
      3. Draw their own map of their quadrant.
      4. Take an aerial photograph of their quadrant. 
      5. Use cutouts of furniture and other room features to represent out the quadrant.
    3. After maps for all four quadrants have been created, lay out the maps using the same orientation as the room. 
      1. For Grades K and 1 – Ask students to describe the locations of items, features or areas in the room by using the following spatial terms: up/down, over/under, here/there, front/back, behind/in front of
      2. For Grade 2 – Add a map title and map key to the classroom map. Ask students to write questions about the map for their peers to answer, or use the map to provide directions to an item (or “hidden treasure”).
  4. On the “This is my house” page, ask students to list examples of rooms in the school (library, cafeteria, gym, etc.) and other features they should include on their school map. 
    1. Students could draw a map of the school and include the listed features. If a school map is available, students could start with the basic structure and add room names, numbers and other features. If a map is not available, Google Maps can be used to provide a building outline (Map view) or a more detailed aerial view (Satellite view). When using Map view, zooming in is necessary before individual buildings will appear.
    2. If possible, walk around the building to include outdoor features on the school map.
  5. On the “This is my street” page, ask students to add the street name and address of the school. List other buildings and features (parks, playgrounds, baseball fields, ponds, etc.) near the school.
  6. As students continue to write their own version of Me on the Map, they can use hand drawn maps, pictures, screenshots from Google Maps, etc. These could be annotated with additional text or with voice-overs.
  7. Once all of the pages are completed, students can use PowerPoint, SchoolTube, Fotobabble, Shuttersong, Storyjumper or other tools to publish their book. Please note that these sites like YouTube and Vimeo are often public and anyone can post and view content. Please be sure to preview examples, and their related content videos, and take appropriate steps t ensure student privacy. If district policy allows, share the books on school websites, or exchange books with teachers in other districts, states or countries.  

2 Comments
Abi K link
11/5/2016 12:08:43 pm

Me on the Map is a great book! My students love the pictures. We drew arial maps of our bedrooms. On another day, we used Google Earth to show the world view, then zoomed into see the continents (which is a difficult concept for little ones), countries, states, cities, then to our own school. We then had some time to look up a few student addresses. They were so into it that we extended that another day to include the rest of the class. (We found that 9 of the students didn't know their address, so this was a great practice for them to learn their address for the project.) Great ideas!

Reply
Abi K
11/5/2016 12:10:49 pm

Oops, I forgot to mention that I teach 2nd grade.

Reply


Leave a Reply.

Powered by Create your own unique website with customizable templates.
  • Home
  • Resources
    • First Impressions and Wildlife as Symbols
    • Oh Deer
    • Field Study Fun
  • Photos
  • Digital Media Sources
  • Get Outside!
  • About Us
  • Contact Us